Using this guide today#
This example uses Azure Functions v1 and the old DocumentDB extension. New projects should follow the current Cosmos DB binding documentation. The package references and function signatures below are retained as a record of the original implementation. Do not ignore dependency compatibility warnings when adapting them.
The anonymous write endpoint is a local demonstration. Add authentication and input validation before exposing a write API to other users.
Expanding our serverless REST API#
If you haven't yet, it would be good to get started by reading my previous blog post. It detailed how to provision the Azure Function and Cosmos DB, Add data to the database, & create a simple HTTP trigger function that returns data from a Cosmos DB collection.
This article will expand the function we created in our previous application by adding a function to add and update records in our Cosmos DB instance. We will also migrate our code from the IDE within the Azure Portal and use the Function SDK within Visual Studio. Using Visual Studio is hugely beneficial because it gives access to several tools to increase productivity and source control integration.
Installing the Azure Functions SDK#
First off, you will need to install Visual Studio (if you haven't already) and get the SDK. We can achieve this by navigating to Tools → Extensions and Updates. Click "Online" and search for and install "Azure Functions and Web Job Tools" on the left pane. This extension will install all of the required tools to build and deploy Azure Functions in Visual Studio.
Creating the function solution#
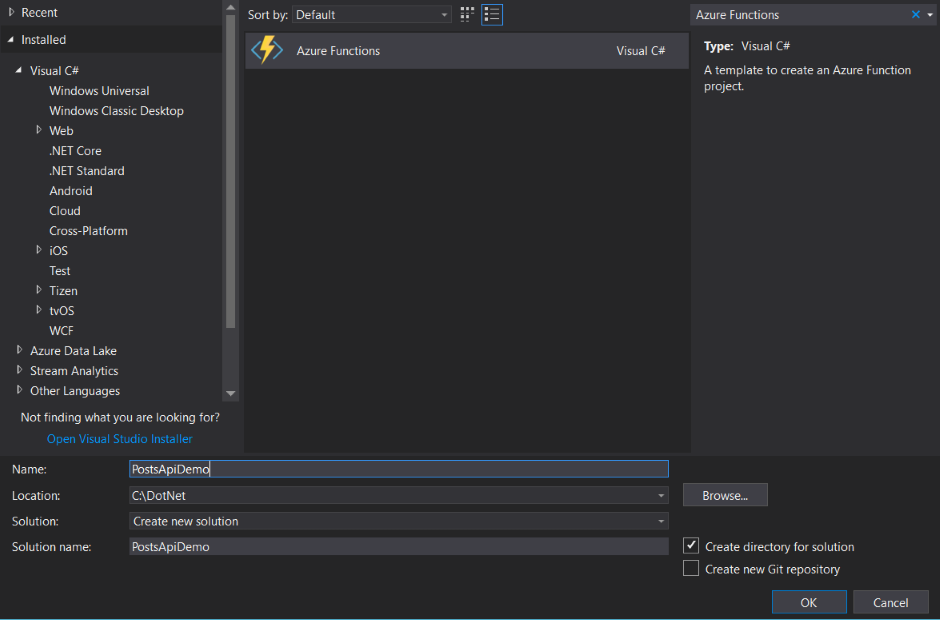
After installing the Azure function SDK, we can now create a function project. You can do this by navigating to File → New Project → Search for "Azure Functions", and selecting the first result → Give the project a name and location → Click OK to confirm.
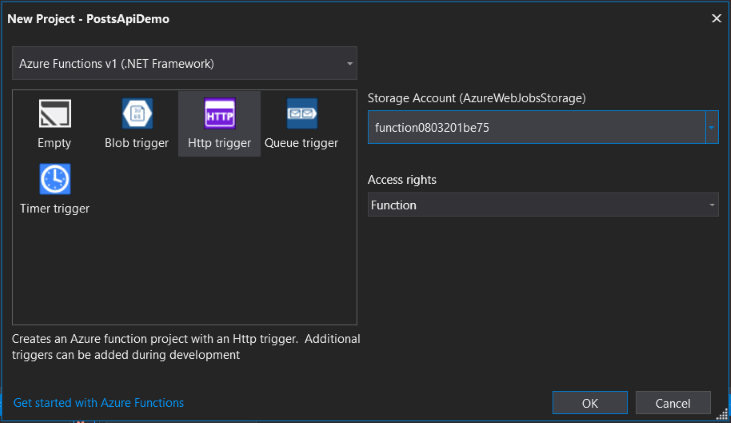
The following prompt confirms the trigger settings for the function. In this example, we will choose the storage account created in my previous article (or use the emulator if you do not have an Azure Account). For the trigger itself, we will create an anonymous HTTP trigger. Ensure to select Azure Functions v1 from the top dropdown - At the time of writing, Azure Functions v2 for .NET Standard is in preview.
 Once we have created our function, we will first need to import the required NuGet packages, including Newtonsoft - A library for working with JSON in .NET and the extension for Cosmos DB interfacing. We will need to edit the .csproj file inside our solution to do this. We can achieve this by right-clicking the project inside solution explorer and clicking "Edit YOUR_PROJECT_NAME.csproj".
Once the project file has been opened for editing amend the package references to look like the following:
<ItemGroup>
    <PackageReference Include="Microsoft.Azure.WebJobs.Extensions.DocumentDB" Version="1.2.0" />
    <PackageReference Include="Microsoft.NET.Sdk.Functions" Version="1.0.13" />
    <PackageReference Include="Newtonsoft.Json" Version="11.0.2" />
    <PackageReference Include="Newtonsoft.Json.Schema" Version="3.0.10" />
</ItemGroup>
Rebuild the solution to restore the packages. These versions describe the original 2018 example. If you encounter package compatibility warnings, resolve them against the runtime and SDK versions you are using before continuing.
Creating the functions#
Now that we have imported the packages we require, we can now move on to creating our first Azure Function class. The first piece of functionality we will make is a simple GET method that will return all records in our Cosmos DB posts collection (similar to what we created in my previous post). The first thing we need to do is rename the existing class file in our function solution; in this example, I will name it "GetPosts". Here is the code for the function (Modify the code to enter details of your own Cosmos DB instance.)
public static class GetPosts
    {
        [FunctionName("GetPosts")]
        public static HttpResponseMessage Run(
            [HttpTrigger(AuthorizationLevel.Anonymous, "get", Route = null)]
            HttpRequestMessage req,
            TraceWriter log,
            [DocumentDB("YOUR_COSMOS_DB_INSTANCE_NAME", "posts",
            ConnectionStringSetting = "CosmosDbConnection")]
            IEnumerable<object> posts)
        {
            return req.CreateResponse(HttpStatusCode.OK, posts);
        }
    }
There are a couple of things to note in this code that you may not be familiar with if you have only previously used the Azure IDE to create a function. Firstly, those input parameters have attributes that determine settings such as authorization levels, routing and database connection strings. Notice that one of our input parameters is a connection of posts representing all of our Cosmos DB collection items. To connect to our database, we need to specify the Cosmos DB connection string provided in the Azure portal and copy this into the local.settings.json within our project.
Your local.settings.json file should look similar to this. Your Cosmos DB instance connection string can be found under "Keys" in the Azure portal.
{
    "IsEncrypted": false,
  "Values": {
    "AzureWebJobsStorage": "YOUR_STORAGE_ACCOUNT_CONNECTION_STRING",
    "AzureWebJobsDashboard": "YOUR_STORAGE_ACCOUNT_CONNECTION_STRING",
    "CosmosDbConnection": "YOUR_COSMOS_DB_CONNECTION_STRING"
  }
}
We are now ready to give our function a test with all this in place. Run the function by pressing F5. The following console window should display detailing the endpoint URL for our function.
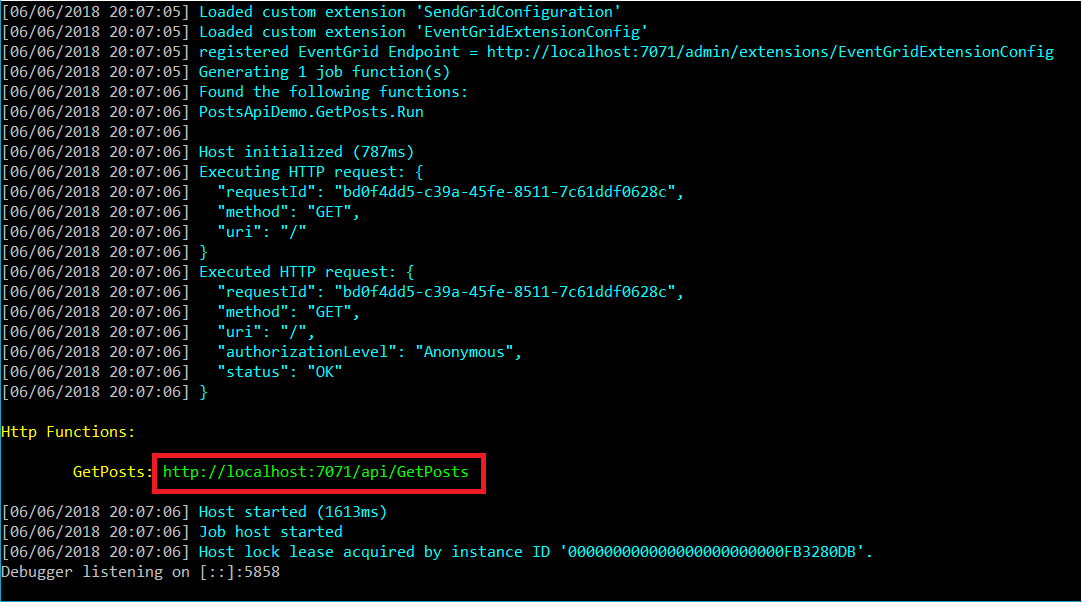
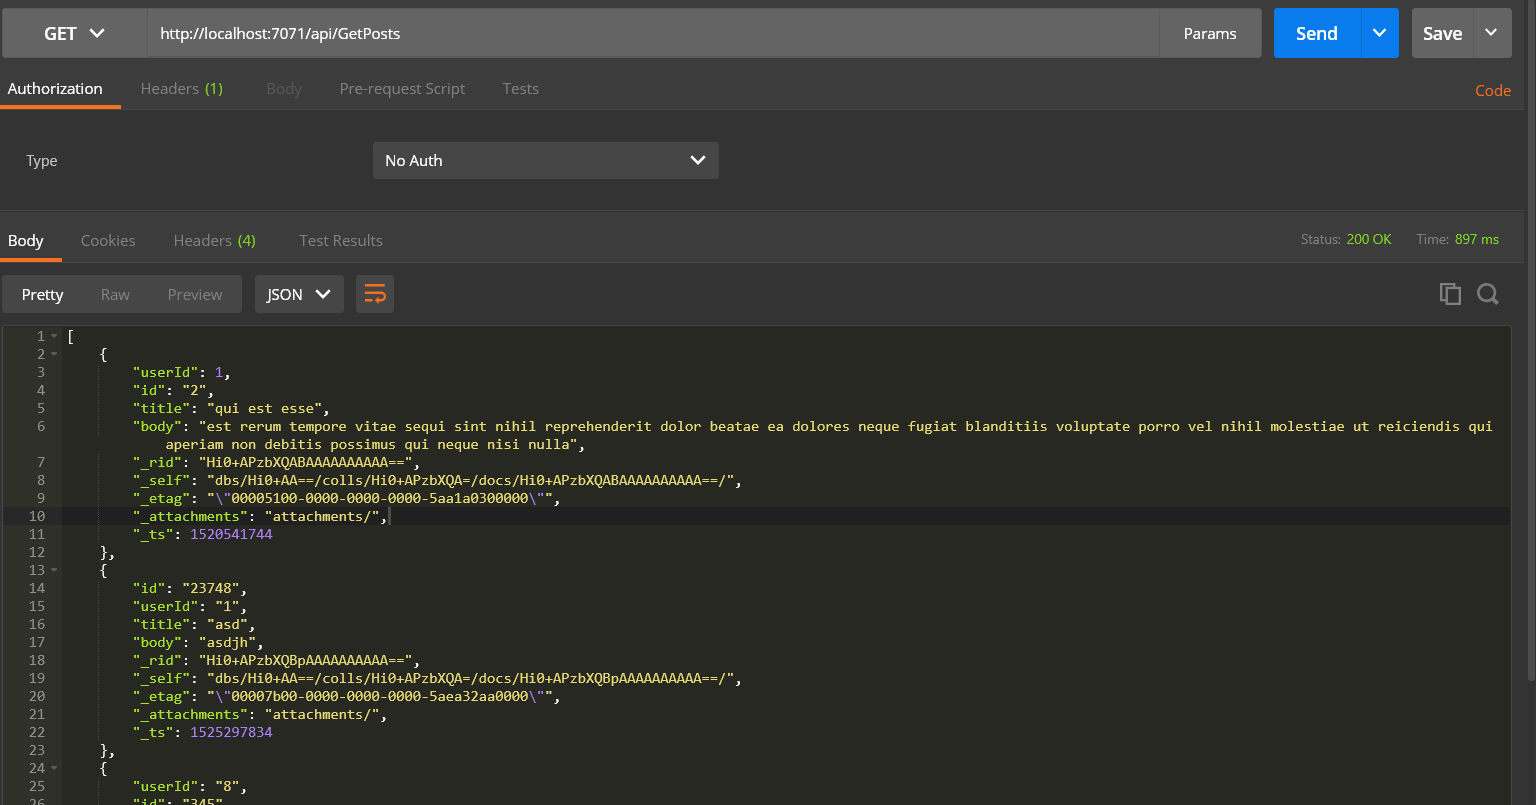
To send a request to our API to retrieve data back, we will use a tool called Postman. First, download the application, select GET as the method call, enter the URL in the console window and press the send button.
If you have any records in the post's collection, you should see them returned in the results windows and a status code of 200 (OK).
The second function we will create has the functionality to create and update posts in our database. As with our previous function, create a new class file by right-clicking our project file and clicking Add → New Item, search for Azure Function and name it "CreateOrUpdatePost". Again, we will create an anonymous HTTP trigger.
Here is the code for our create or update function:
public static class CreateOrUpdatePost
    {
        [FunctionName("CreateOrUpdatePost")]
        public static HttpResponseMessage Run(
            [HttpTrigger(AuthorizationLevel.Anonymous, "put", "post", Route = null)]
            HttpRequestMessage req,
            TraceWriter log,
            [DocumentDB("YOUR_COSMOS_DB_INSTANCE_NAME", "posts", Id = "id",
            ConnectionStringSetting = "CosmosDbConnection")] out object post)
        {
            try
            {
                var requestBody = req.Content.ReadAsStringAsync();

                var generator = new JSchemaGenerator();
                var schema = generator.Generate(typeof(Post));
                var rawPost = requestBody.Result;
                var isPost = JObject.Parse(rawPost).IsValidJson(schema);

                if (isPost)
                {
                    var deserializePost = JsonConvert.DeserializeObject<Post>(rawPost);
                    post = new {
                            userId = deserializePost.UserId.ToString(),
                            id = deserializePost.Id.ToString(),
                            title = deserializePost.Title,
                            body = deserializePost.Body };
                    return req.CreateResponse(HttpStatusCode.OK, post);
                }
                post = null;
                return req.CreateResponse(HttpStatusCode.BadRequest,
                    "Please pass a post on the query string or in the request body");
            }
            catch (Exception ex)
            {
                post = null;
                return req.CreateResponse(HttpStatusCode.InternalServerError,
                    $"The following error occurred: {ex.Message}");
            }
        }
    }

    public static class ValidateJson
    {
        public static bool IsValidJson(this JObject jObject, JSchema jSchema)
        {
            return jObject.IsValid(jSchema);
        }
    }

    public class Post
    {
        [JsonProperty(PropertyName = "userId")]
        public int UserId { get; set; }
        [JsonProperty(PropertyName = "id")]
        public int Id { get; set; }
        [JsonProperty(PropertyName = "title")]
        public string Title { get; set; }
        [JsonProperty(PropertyName = "body")]
        public string Body { get; set; }
    }
This code works by taking a post in JSON format; then, it will validate the raw JSON against our post schema; if it matches successfully will add or update the record depending if there is a post already in the collection with a matching Id. Again we can test this function by using Postman. Start by debugging the application and copying the endpoint address.
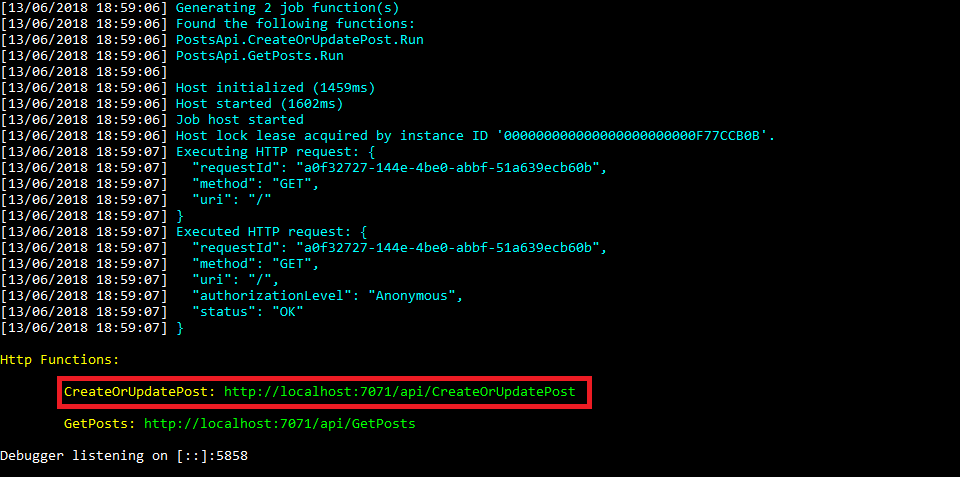
Open Postman and chose POST or PUT as the HTTP method, then paste the endpoint address into the URL section. Next, click the "Body" tab, select the "raw" radio button and paste the following post JSON into the text section.
{
    "userId" : 8,
    "id" : 123,
    "title" : "hello",
    "body" : "world"
}
Then hit the "Send" button. Hopefully, you should get a response including a status code of 200 (OK).
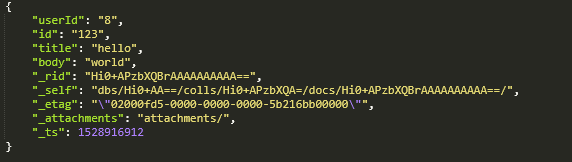
Next, re-run our "GetPosts" method and depending on if you already had a post with id 123 in the database, you should see our post in our Cosmos DB collection.
Wrap Up#
That concludes my two-part series on creating a basic serverless HTTP API using Cosmos DB in Azure. What I have shown here only really scratches the surface of what is possible using serverless functions in Azure. The possibilities are truly endless! If you have any questions, don't hesitate to contact me using my Twitter handle @tomlingdev.